

Step 1: Finalize your jQuery project
Progressier is a tool that lets you add extra features, like PWA installation and push notifications to your jQuery web app. When your app is ready to launch and accessible at a custom domain, you can incorporate Progressier into your project to enhance its capabilities.
Step 2: Register for a Progressier account
Progressier is an all-in-one no-code toolkit for web apps. It usually takes 4 minutes or less to integrate Progressier with jQuery.
Create your Progressier account . Progressier comes with a 14-day free trial that allows you to integrate it into your jQuery app risk-free. You only enter your payment information once everything is working to your liking.
Step 3: Generate your jQuery PWA
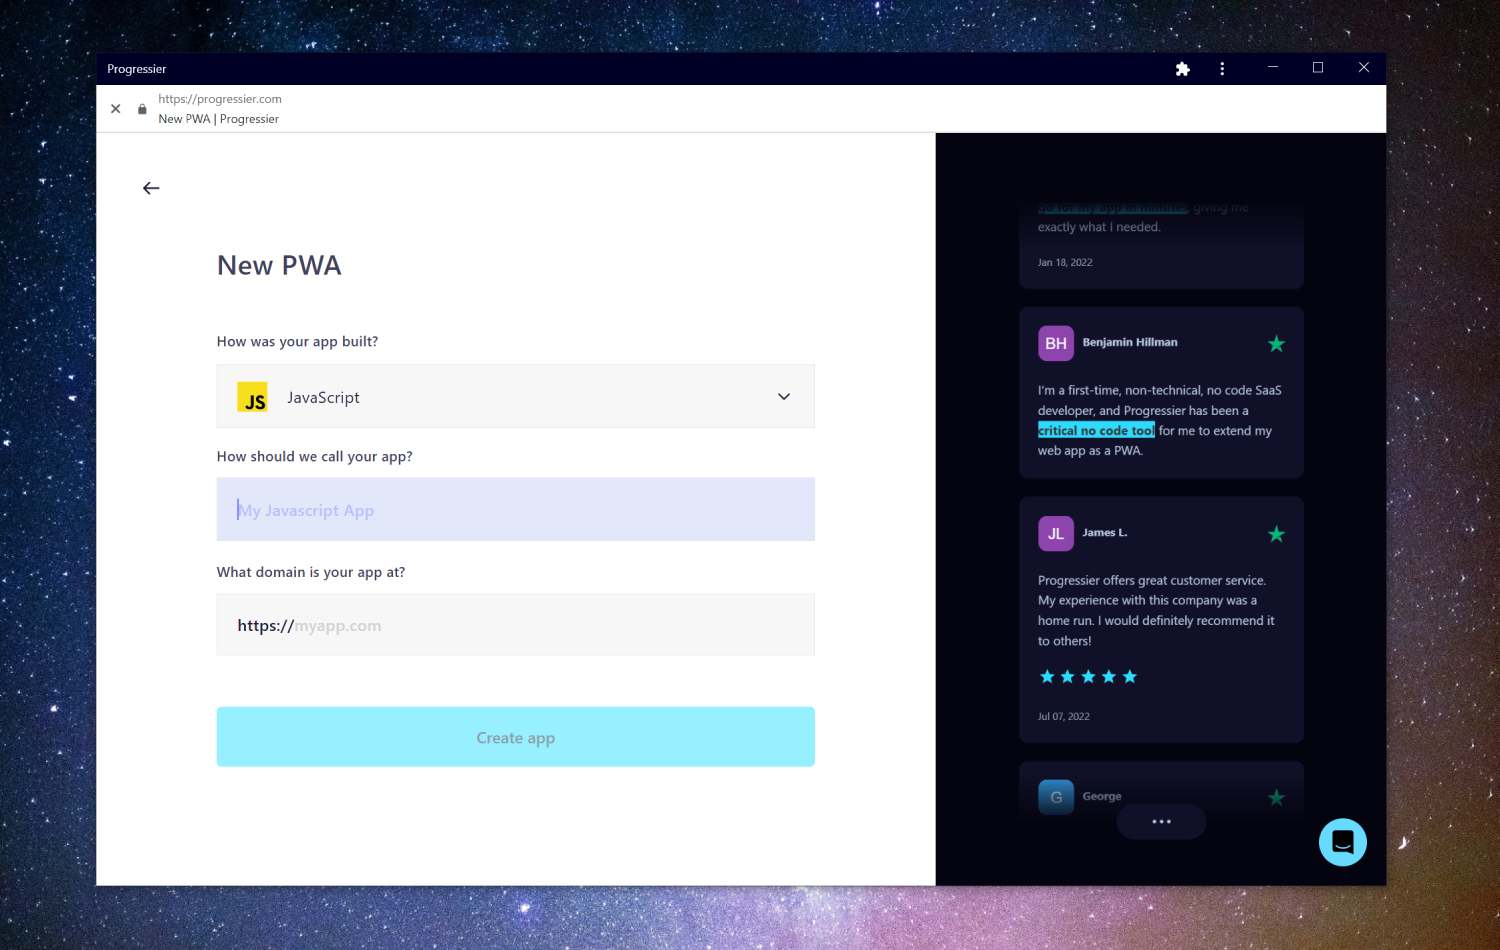
After signing up, you'll be prompted to enter a few details about your app, e.g. how it was built (choose jQuery), the name of your app, and its domain.
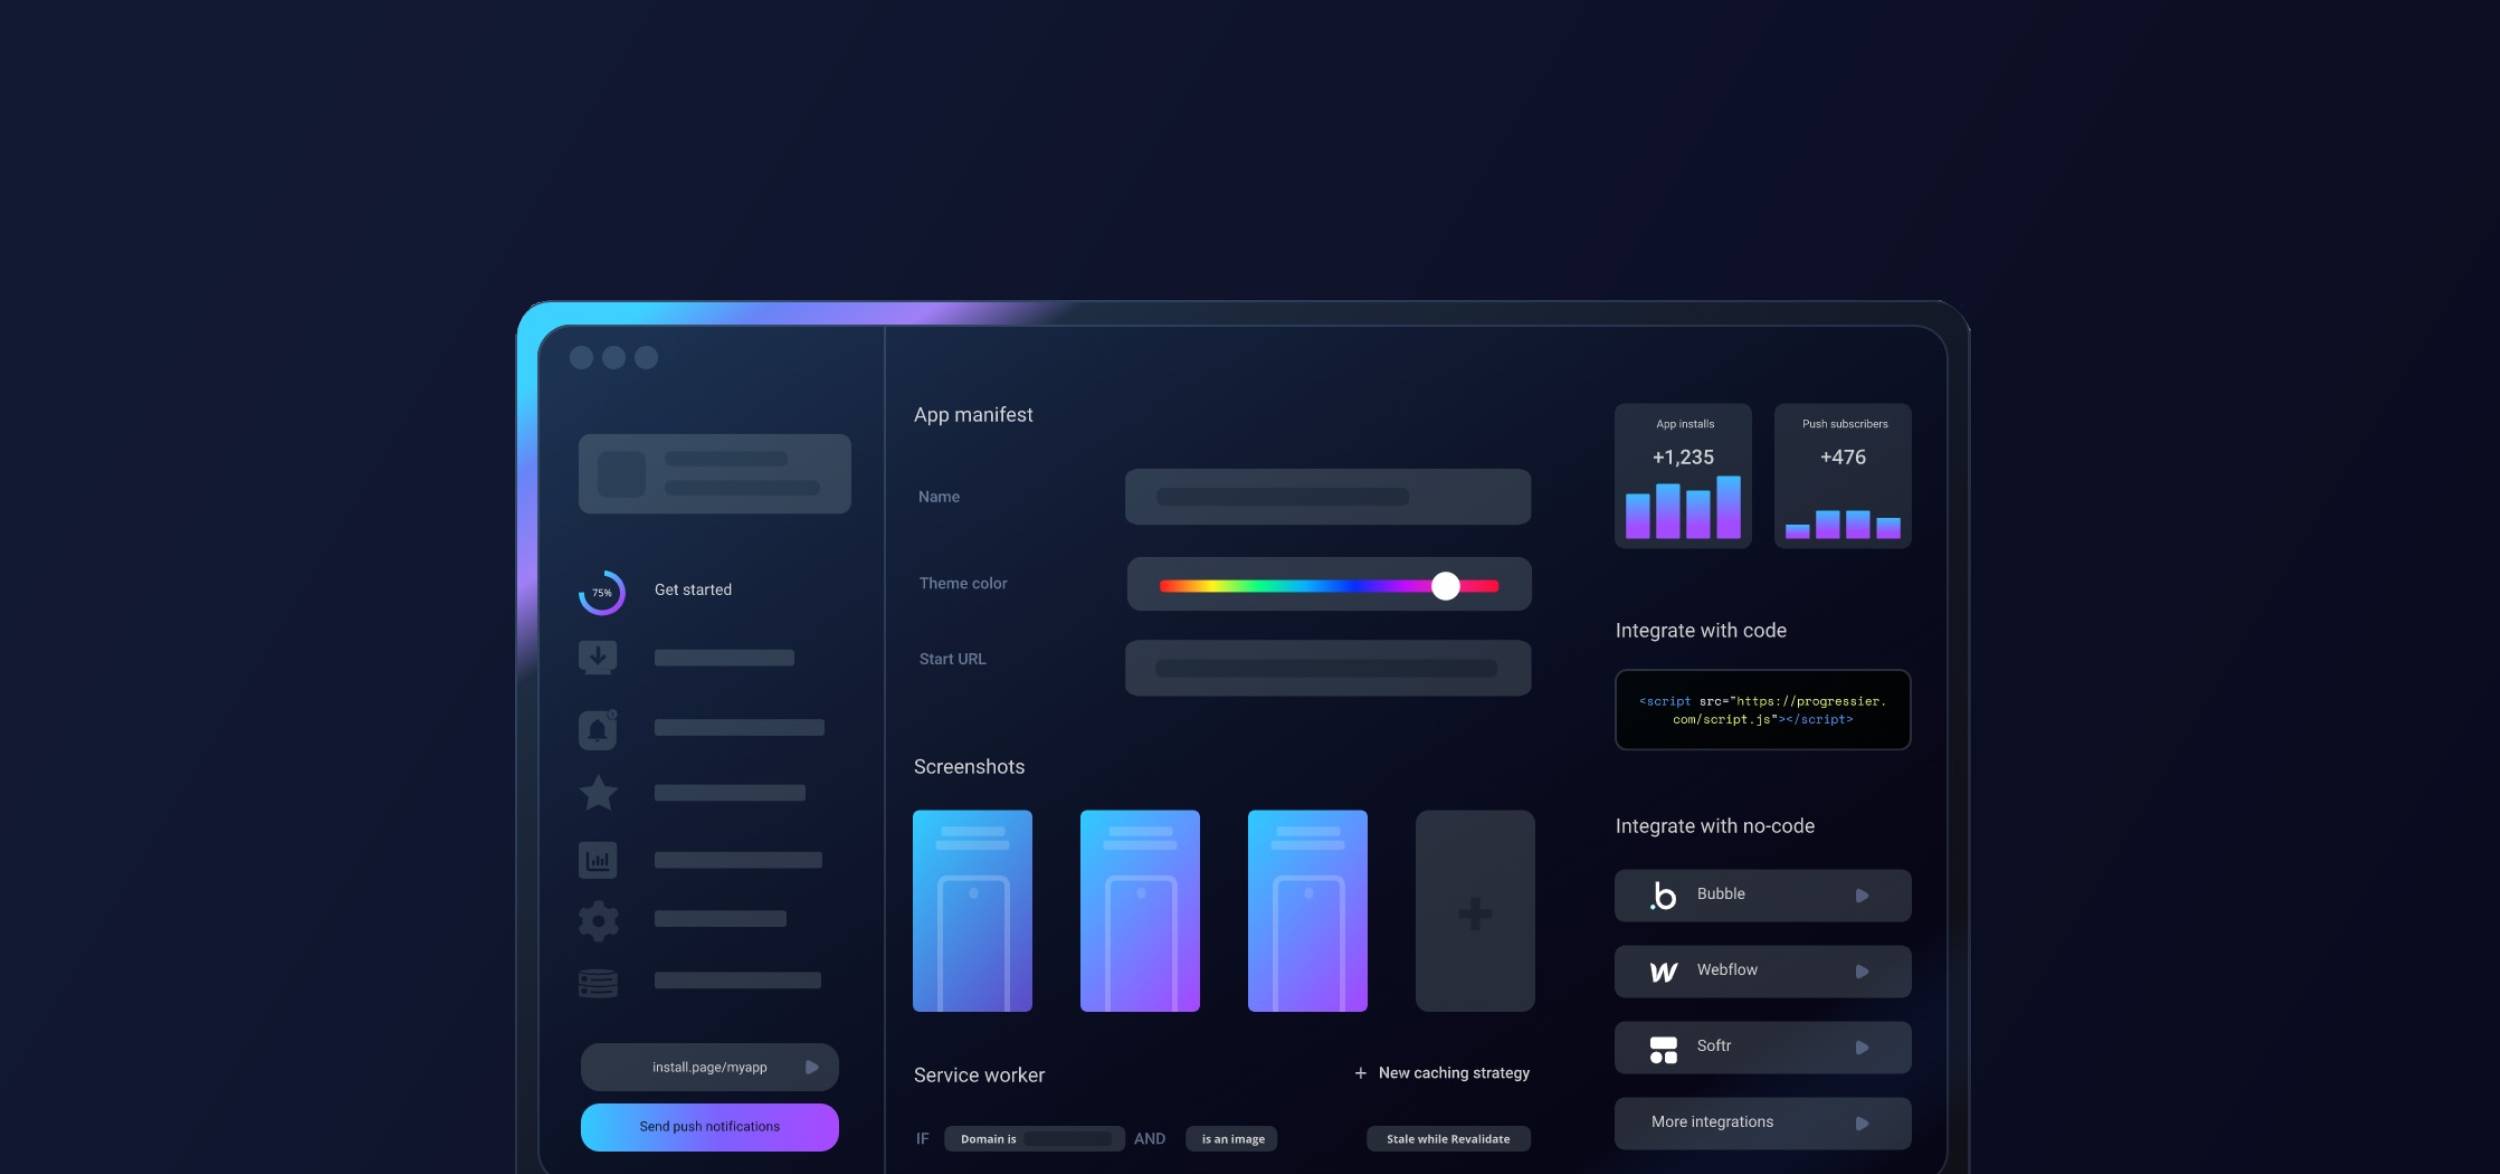
Step 4: Finish configuring your jQuery PWA
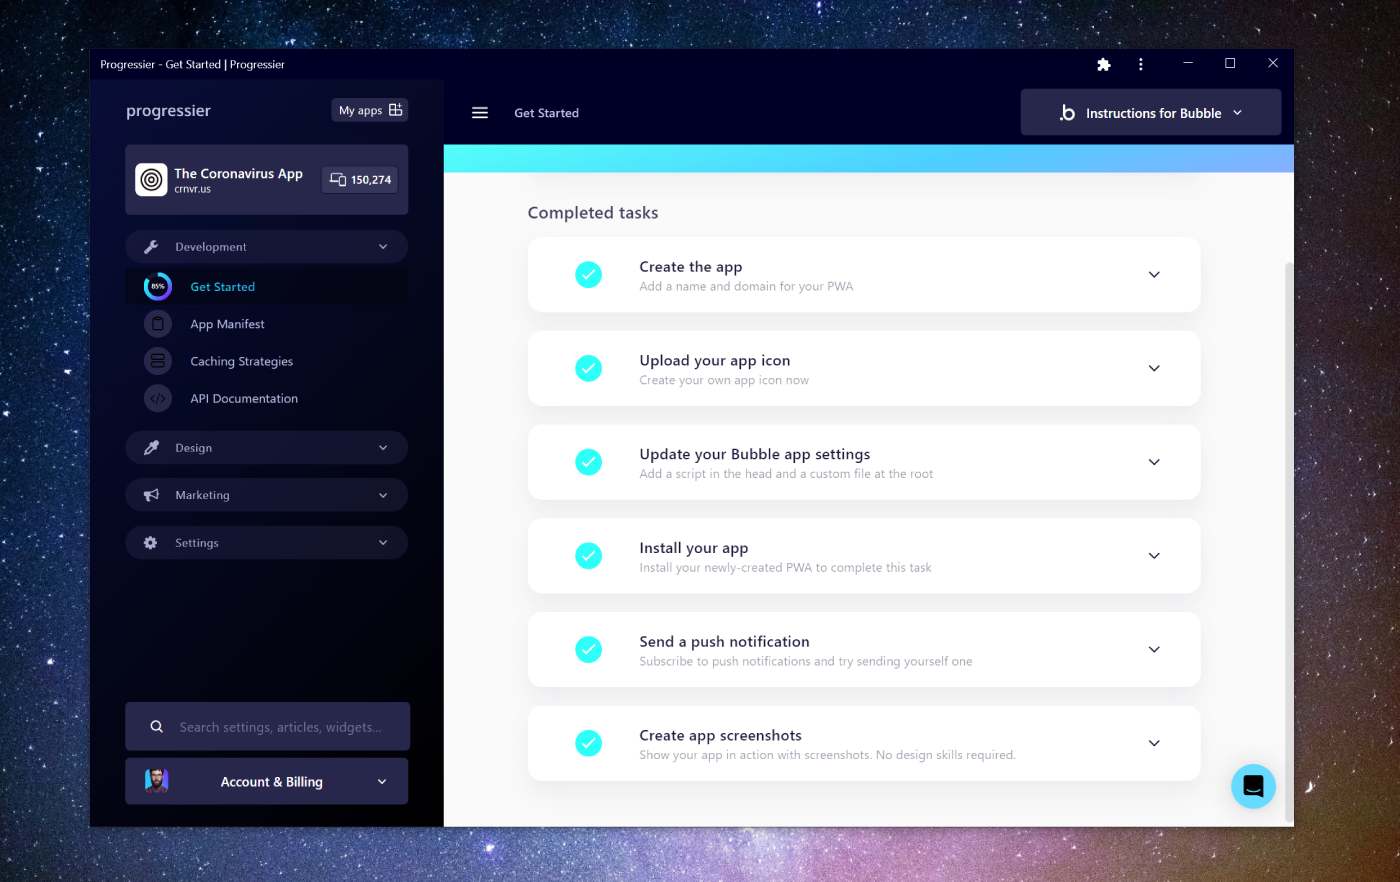
Once logged in to the dashboard, follow the instructions in the Get Started section to complete your jQuery integration. With jQuery, it typically takes about 4 minutes.
Step 5: Authorize push notifications

Now back to your newly-created PWA! You should have been prompted to allow notifications during sign-up.
Step 6: Compose a push notification
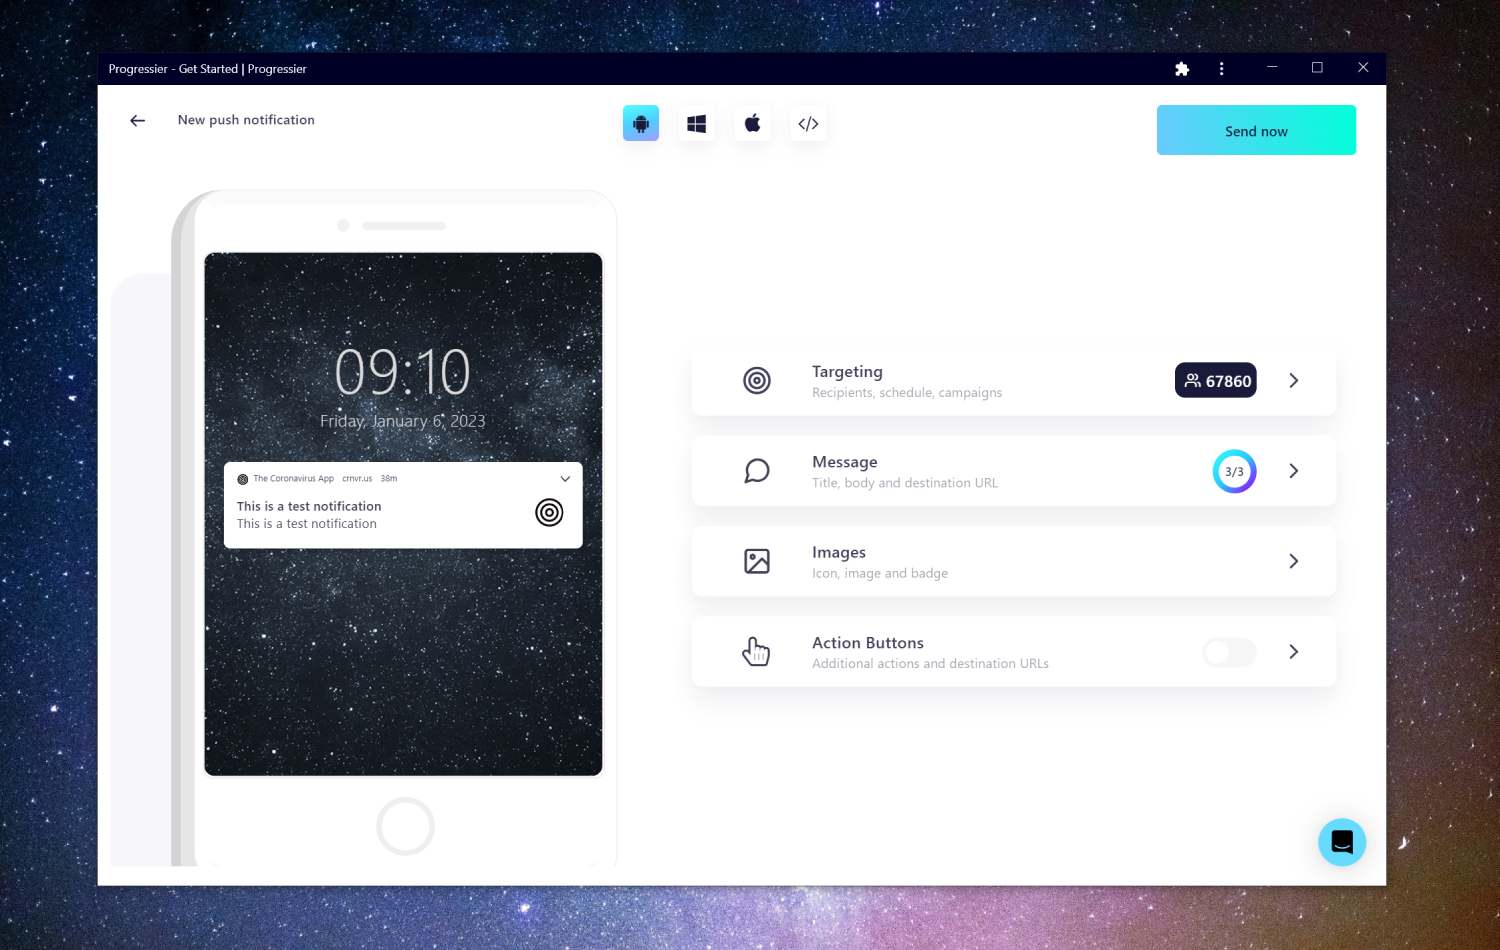
Go to our Push Composer (login required) to compose your first push notification. By default, it will be sent to all your subscribers, but you can target a specific group of users in the Recipients section of the Targeting tab.
Step 7: Use our Push API (optional)
Sending the same notification to every user for marketing purposes is one thing. Sending notifications programmatically to a user to react to events in your jQuery app is another. Luckily, Progressier comes with a solution for both use cases. Simply connect your user data (e.g. a user ID or user email), then call our Push API in your server-side code to send a push notification to a specific user. You don't have to manage push subscriptions on your end.
Why should you add push notifications to your jQuery web app?
Push notifications can improve user engagement, drive traffic back to the app, increase retention rates, boost conversion rates, and provide a better overall user experience.
Drawbacks of push notifications
Unlike native apps, not every browser and device supports push notifications. So you can't entirely rely on this feature to deliver important messages to users.
Some users may consider push notifications to be obtrusive, especially if they're not personalized and used as a marketing tool. Make sure to use them sparingly.
What are the best push services for jQuery apps?
There are many different push notification service providers to choose from for your jQuery app, and the best one for you will depend on your specific needs and requirements. Some of the most popular push notification service providers include:
- Firebase Cloud Messaging: a cross-platform messaging solution that lets you reliably deliver messages at no cost. You can use FCM to send messages to clients on iOS, Android, and the web, as well as on desktop applications.
- OneSignal: OneSignal is a cross-platform push notification service that enables developers to send targeted messages to their users. You can compare it with Progressier here.
- Progressier: probably the best option if you develop web apps as it also comes with additional functionality designed to enhance web apps specifically, e.g. targeted push notifications.
- WonderPush: WonderPush is a cloud-based push notification service that enables developers to send targeted messages to their users on various devices.
Building your own integration with the Web Push API
Creating your own push solution is feasible, but requires some non-trivial engineering. Chances are you'll be better off using an established push service provider. But if you still want to do this yourself, here are the four components you'll need:
1. Widgets to allow push notifications: you can directly call the native push interface. But if users block notifications right here and there, you won't be able to ask them again. Or you can display a widget that tells users why they should allow notifications before actually calling the native browser interface. This is the recommended way to do this.
2. A push subscription database: once a user has allowed push notifications, you'll be given a specific API endpoint for each user. Save it into your database so you can message users later.
3. An interface for preparing the payload of the notification: a push notification is a JSON object with properties such as title, body, and icon which define the content of the notification itself. You must have a user interface that allows you to define these parameters before they're sent to your push queue.
4. A delivery service: if you have more than a few hundred simultaneous recipients, you'll need to build a push queue that takes care of processing push notifications.
On which devices and browsers can push notifications be received?
You can send push notifications to users on most browsers, including Chrome (Windows, Android, macOS), Firefox (Windows, Android, macOS), Edge (Windows, Android, macOS) and Safari (macOS Ventura).
