

Step 1: Set up your Bubble project
Progressier can enhance your Bubble web app with additional features such as push notifications and the ability to be installed as a Progressive Web App (PWA). You can incorporate Progressier into your project when your app is live and accessible at a custom domain.
Note that setting up a custom domain with Bubble may require a paid plan. Make sure to upgrade your plan before going any further to be able to use all required features.
Step 2: Create a new Progressier account
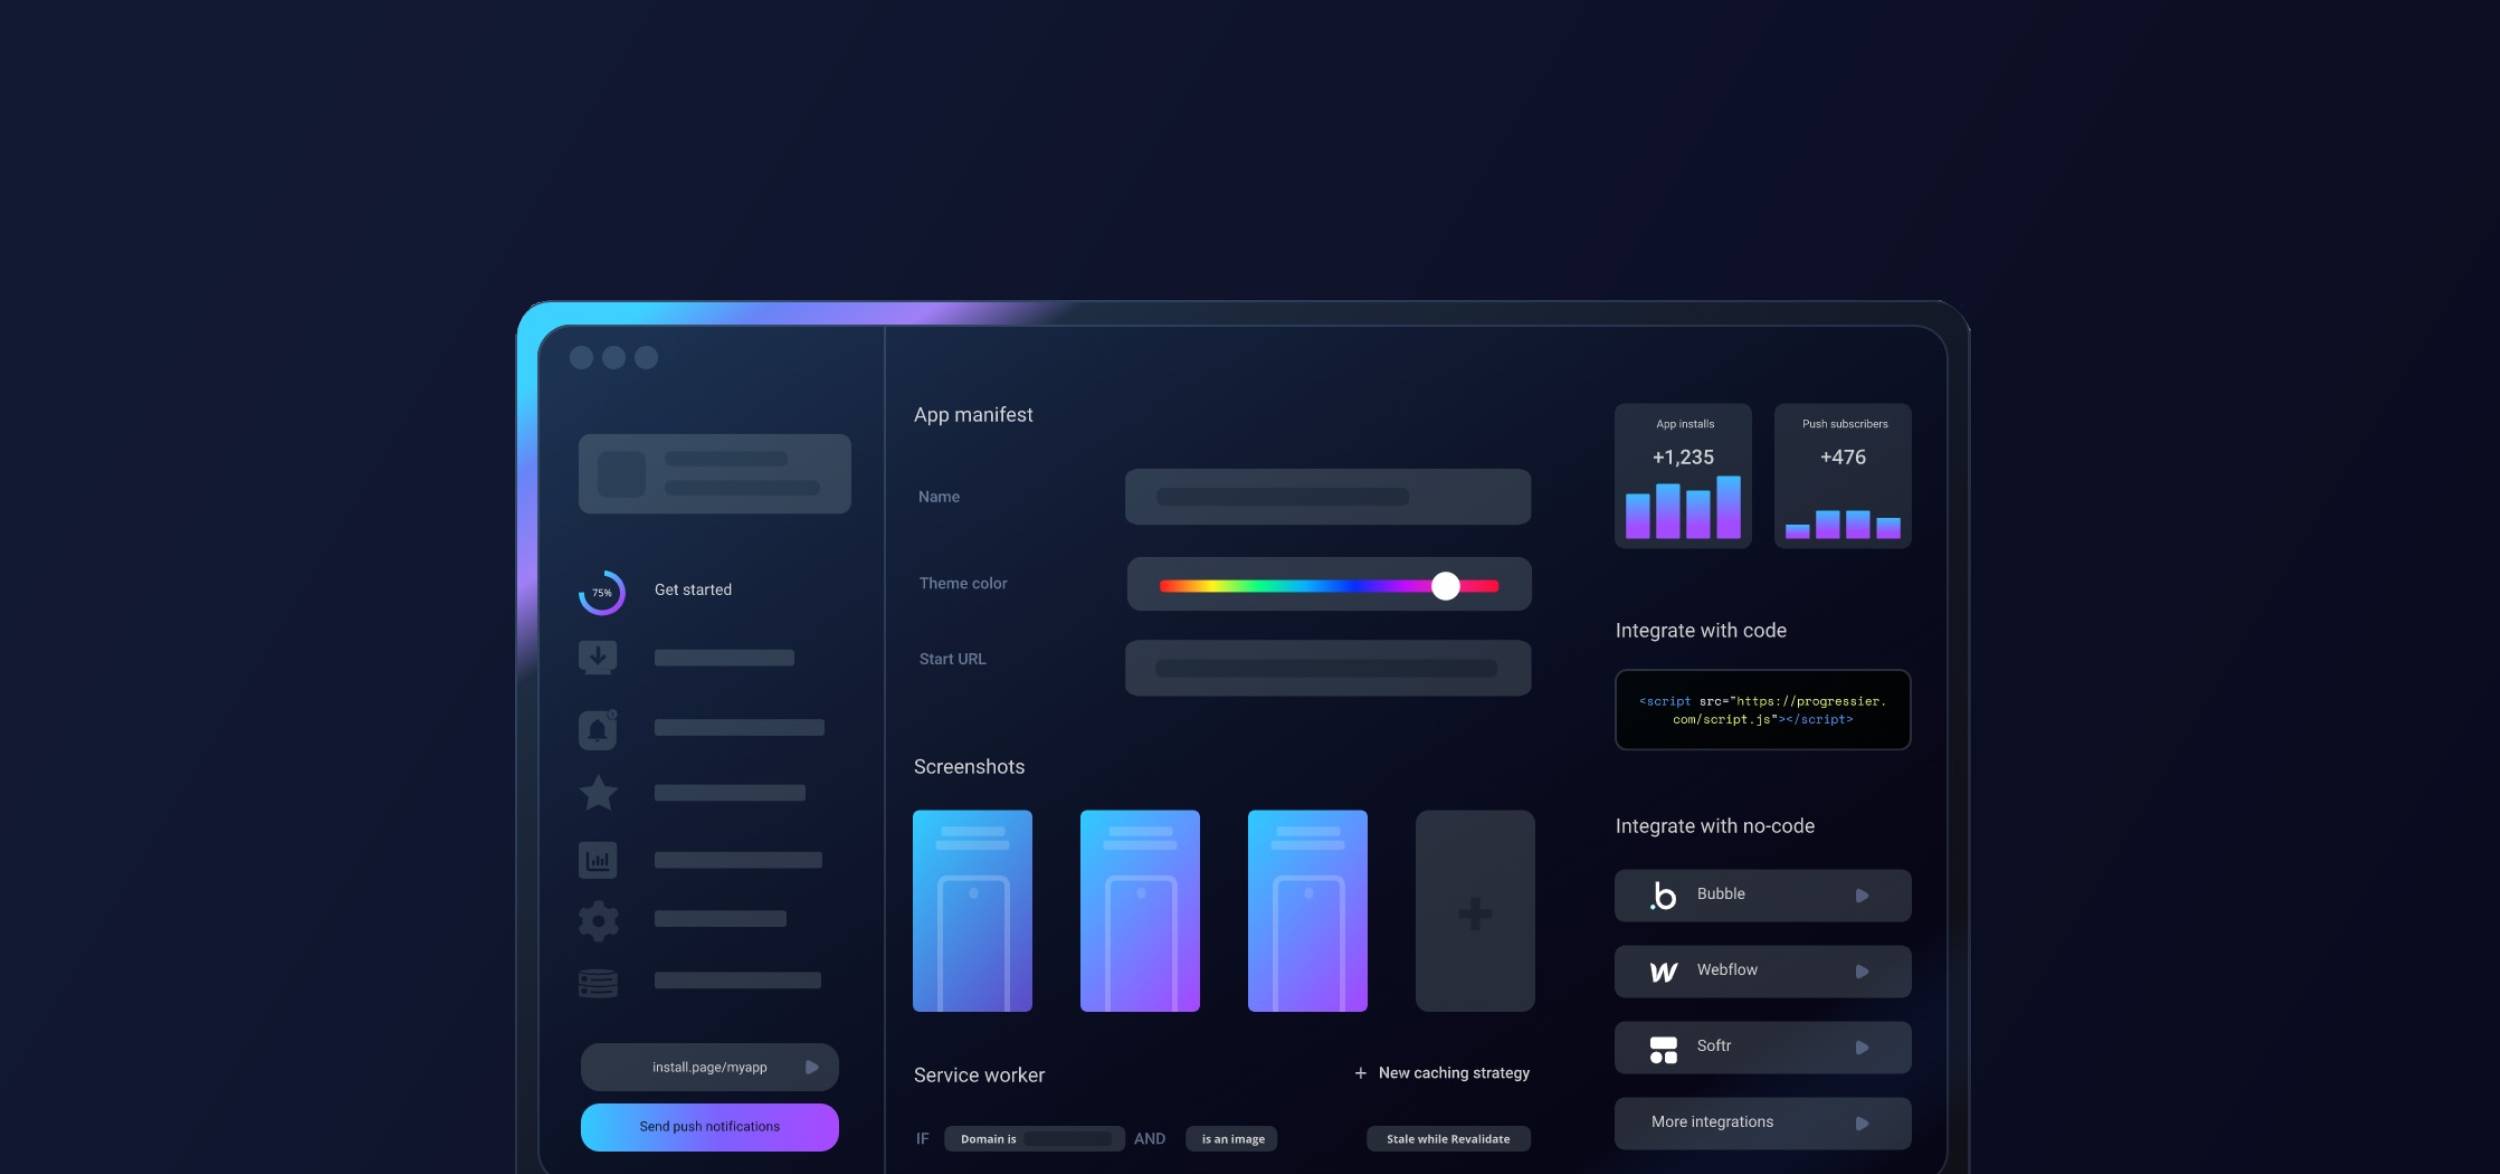
Progressier is a web toolkit that allows you to easily add new capabilities to your Bubble app (and apps from hosting providers as well) using little to no code at all.
If you haven’t done so already, create your Progressier account. It comes with a free trial (no credit card required!) so you can test all features free of charge for 14 days without risk.
Step 3: Create your PWA
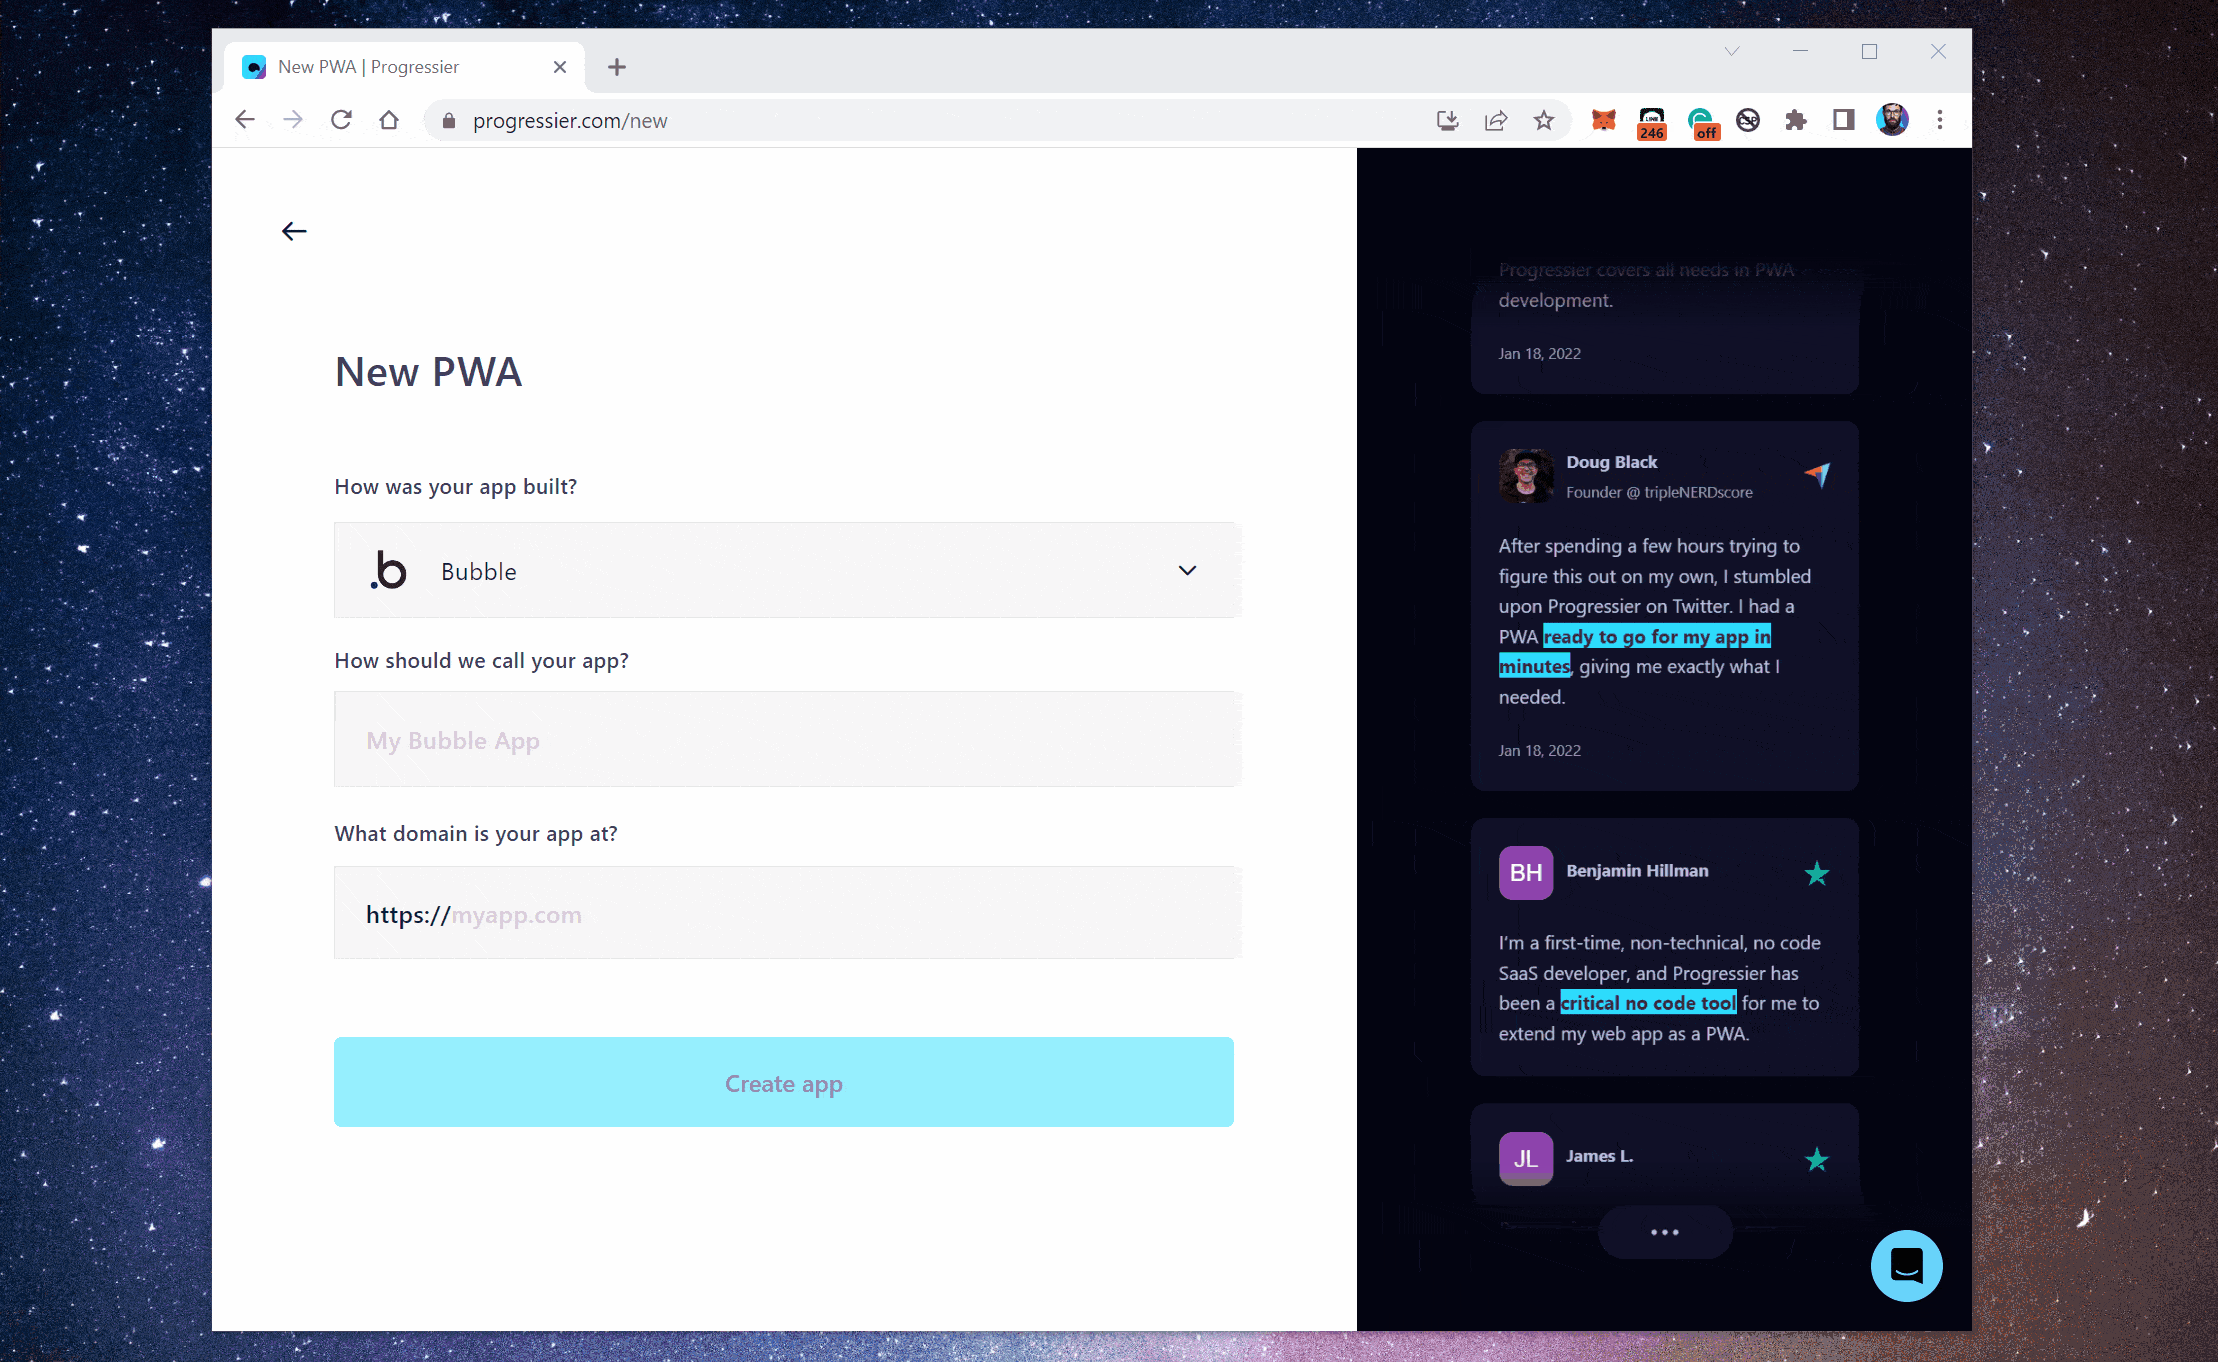
Next, create your Bubble app in Progressier. Go to New PWA, then select Bubble in the first dropdown menu. Give your app a name and paste the URL of your Bubble project in the third field.
Step 4: Finish setting up your Bubble PWA
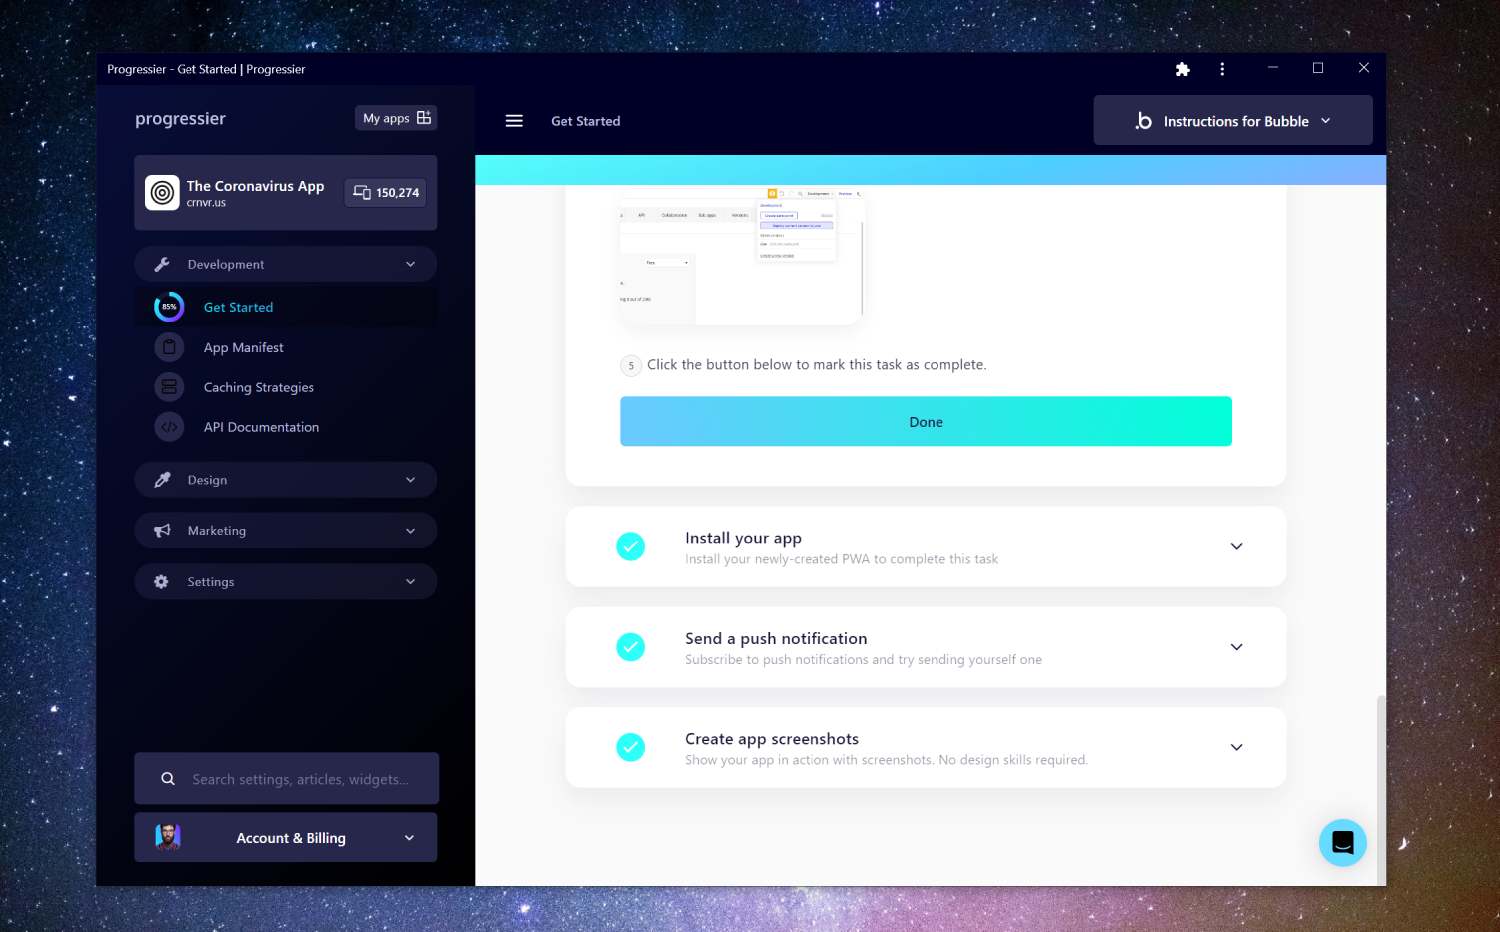
We'll show you a series of tasks. These tasks are easy and shouldn't take you more than a few minutes to complete. If you run any bottlenecks, reach out to us using the Intercom widget at the bottom-right corner of the page.
Step 5: Allow push notifications
Head back to your app's domain. You should be prompted to allow notifications. If not, click on the Floating Action Button at the bottom-right corner of your app. There are also other widgets you can use to ask users to allow notifications.
Step 6: Compose your first notification
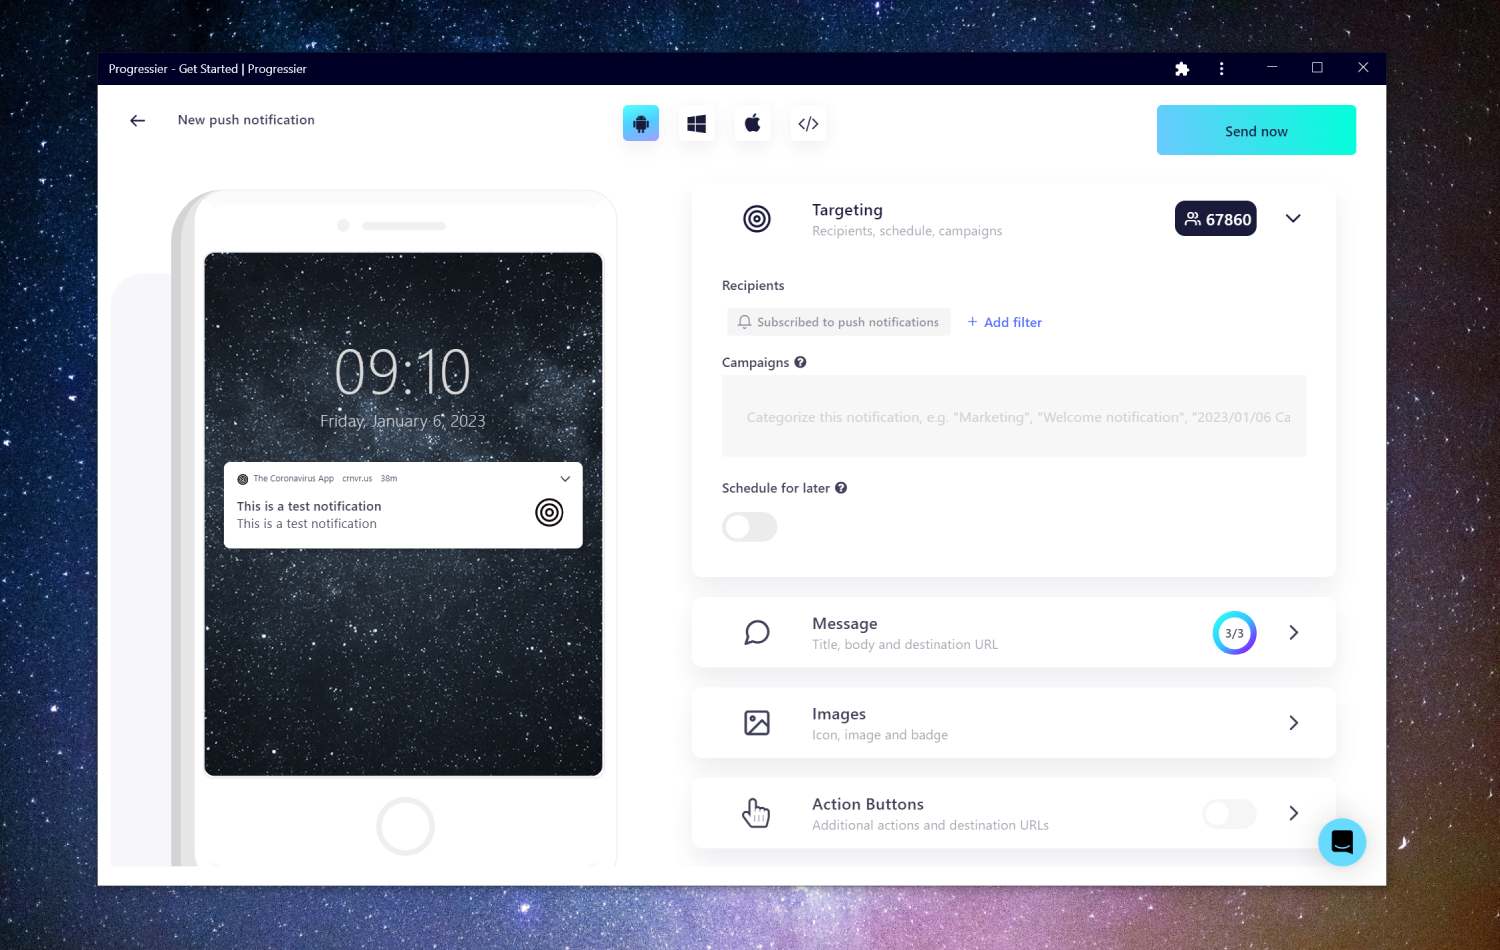
Our Push Composer allows you to compose a notification, select a specific group of users of your Bubble app to send it to, and even schedule its actual delivery from 15 minutes to 14 days in the future.
Step 7: Install our Bubble plugin (optional)

Our Bubble plugin greatly simplifies the process of sending personalized push notifications. Simply install our plugin, and connect your Bubble user emails with their push subscriptions. You're now able to notify users programmatically from any Bubble workflow. Easy peasy.
How can push notifications enhance your Bubble app
1. Improving user engagement: Push notifications can help keep users engaged with your app by delivering timely and relevant updates and information.
2. Driving traffic to the app: Push notifications can help drive traffic back to your Bubble app by providing users with a reason to open it.
3. Increasing retention rates: Push notifications can help keep users coming back to the app by providing them with valuable and interesting content.
4. Boosting conversion rates: By delivering personalized and targeted messages to users, push notifications can help increase conversion rates and drive sales.
5. Providing a better user experience: Push notifications can provide a more convenient way for users to receive updates and information from your app, improving the overall user experience.
The disadvantages of push notifications in Bubble
The Web Push API is only partially supported across devices and browsers. So with your push integration, you'll be able to reach only a portion of your user base (Android and Desktop — not iOS).
Because of their limited deliverability, push notifications are not as flexible as email or even text messages as a communication tool. Also, it's easy for users to unsubscribe from your notifications, so you'll have to make sure you don't notify them too frequently.
What are the best push services for Bubble apps?
Here are some popular examples of push services Bubble app owners like to use:
- Firebase Cloud Messaging (FCM): This is a free, cross-platform messaging service provided by Google that allows you to send push notifications to Android, iOS, and web devices.
- OneSignal: Probably the most popular option for push notifications. OneSignal works well across platforms and provides more options than FCM but can be quite costly, especially at scale.
- Progressier: Progressier is a PWA toolkit that allows developers and no-code makers to effortlessly send push notifications for marketing or targeted messaging purposes. It is built specifically for web apps and may not be the best option for websites or native apps.
- WonderPush: WonderPush is a cloud-based push notification service that enables developers to send targeted messages to their users on various devices.
- PushEngage: Another popular option for push notifications on the web.
Developing your own push notification solution
If you're using Bubble, it's likely you value simplicity and getting things done quickly. Building your own push service requires code (a ton of it!) and is a non-trivial engineering effort. While sending a notification to one user is easy, sending it to many simultaneously is pretty hard and requires capabilities that can't be replicated in no-code or low-code platforms.
Which platforms are compatible with push notifications?
The Web Push API is compatible with Windows (via Chrome, Edge, Firefox, Opera), macOS (Firefox, Chrome, Edge, Safari 16 on macOS Ventura), Android (Samsung Internet, Chrome, Firefox). Push notifications will also soon be available on iOS with Safari.
